Unlocking Email Automation: How to Seamlessly Integrate Zapier’s Email Parser with HelpSpot

Written by Ian Landsman · 10.02.2023

Did you know that one of the significant hurdles businesses face in automation is extracting structured data from unstructured sources like email? If you deal with automated emails and wish you could do something with the data in those emails, Zapier’s Email Parser offers a compelling solution.  

This dynamic tool doesn’t just scan emails; it extracts vital data from your emails and flawlessly integrates them with many other applications. Whether you want to update your CRM, initiate specific email-triggered workflows into a tool like HelpSpot, or streamline customer queries, the Email Parser could be a game-changer. Its efficacy lies not just in discernment and extraction but also in its user-friendly setup. And, when used alongside platforms like HelpSpot, the power of this tool truly shines, allowing your business to do things you never thought possible with email. So let’s get started!

Zapier Email Parser Setup:

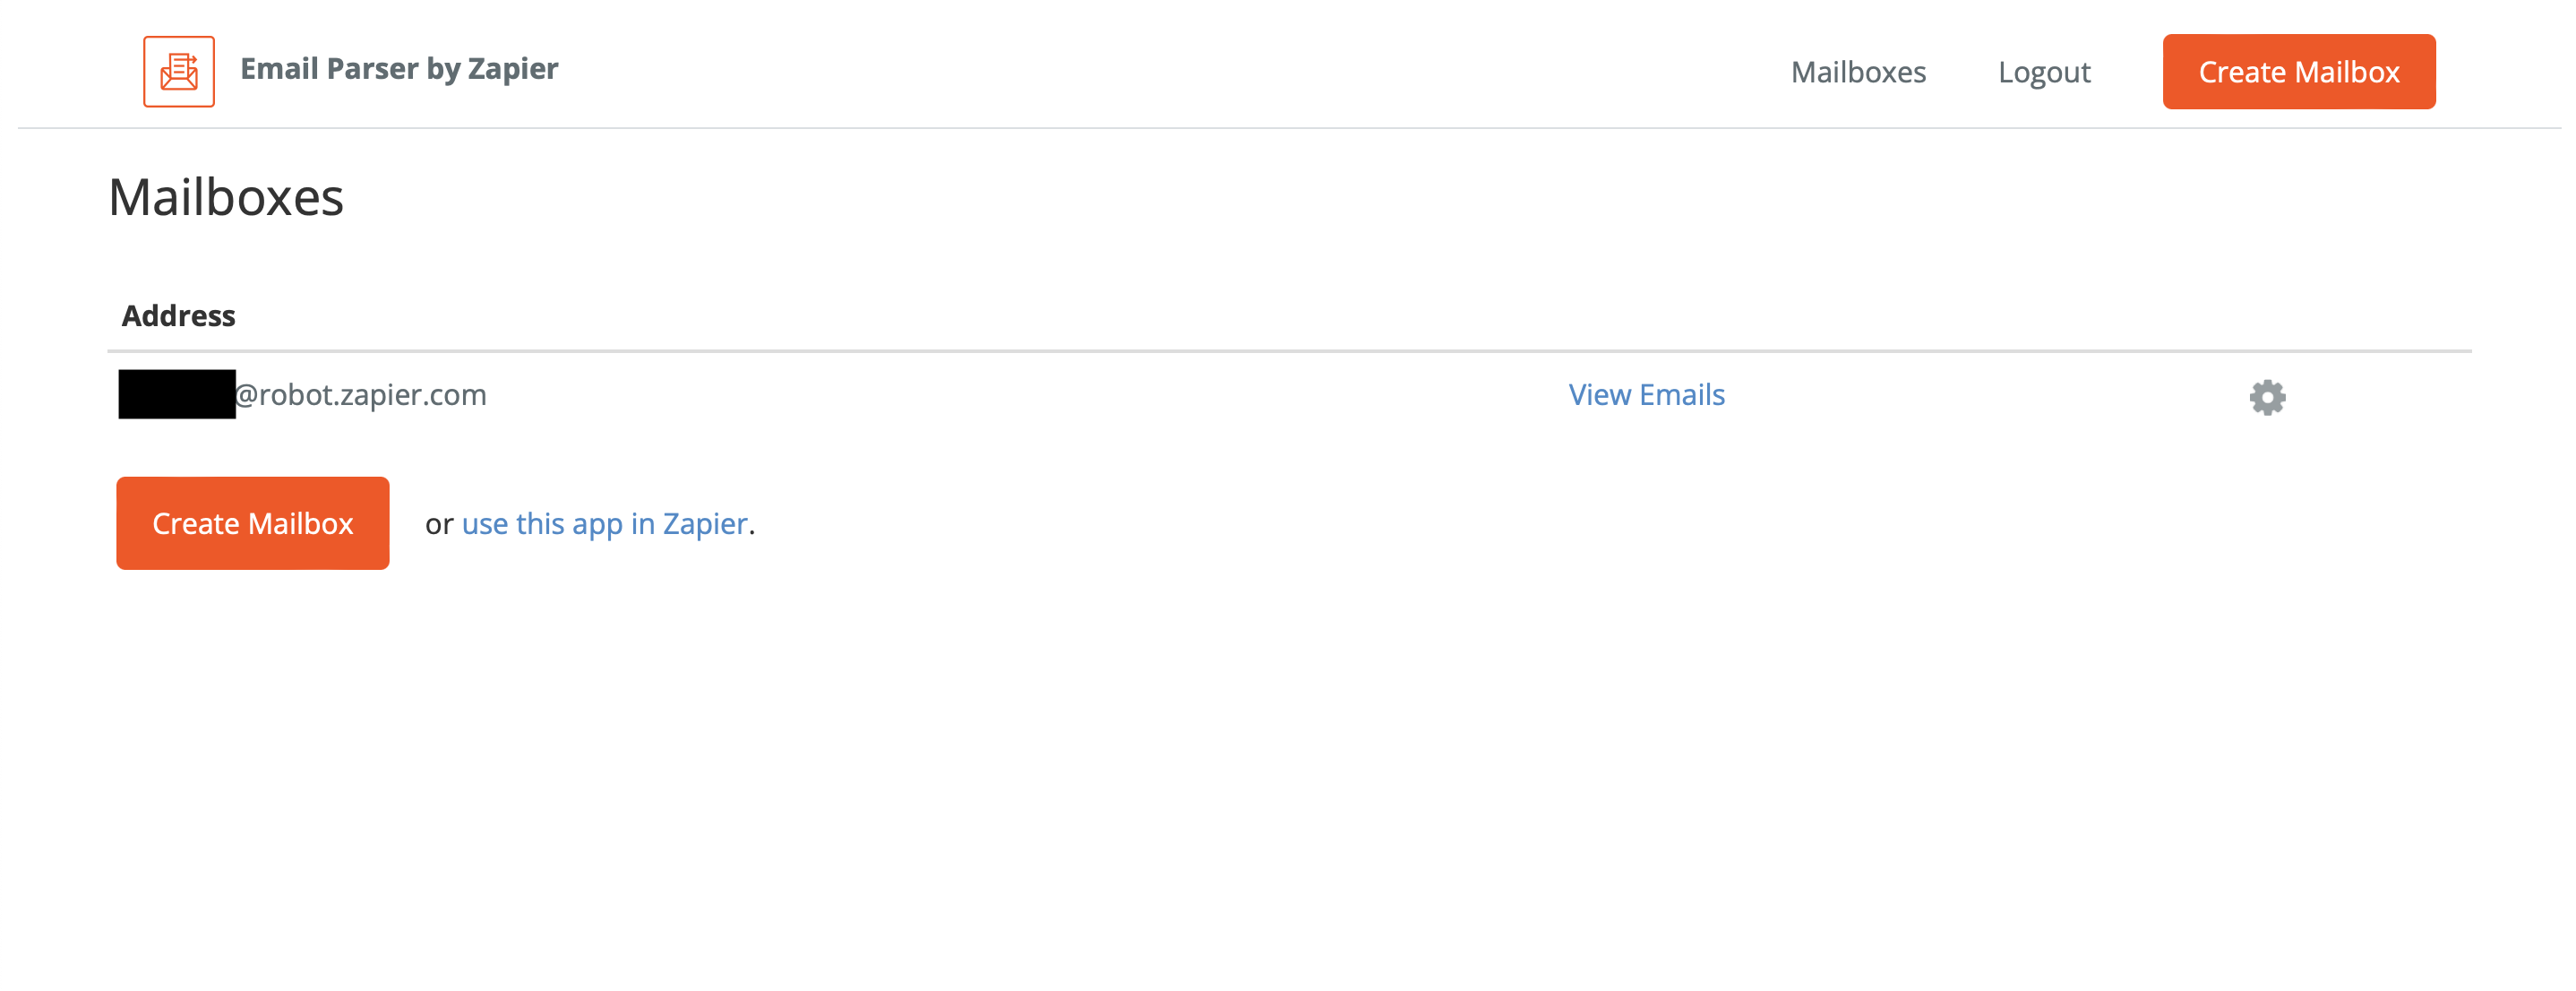
Sign Up & Create a Mailbox:

  • Visit parser.zapier.com.
  • Register for a new account.
  • After registration, create a new mailbox.

Email the New Mailbox:

  • Send an email to the new mailbox address you’ve created. Format it like your automated emails.

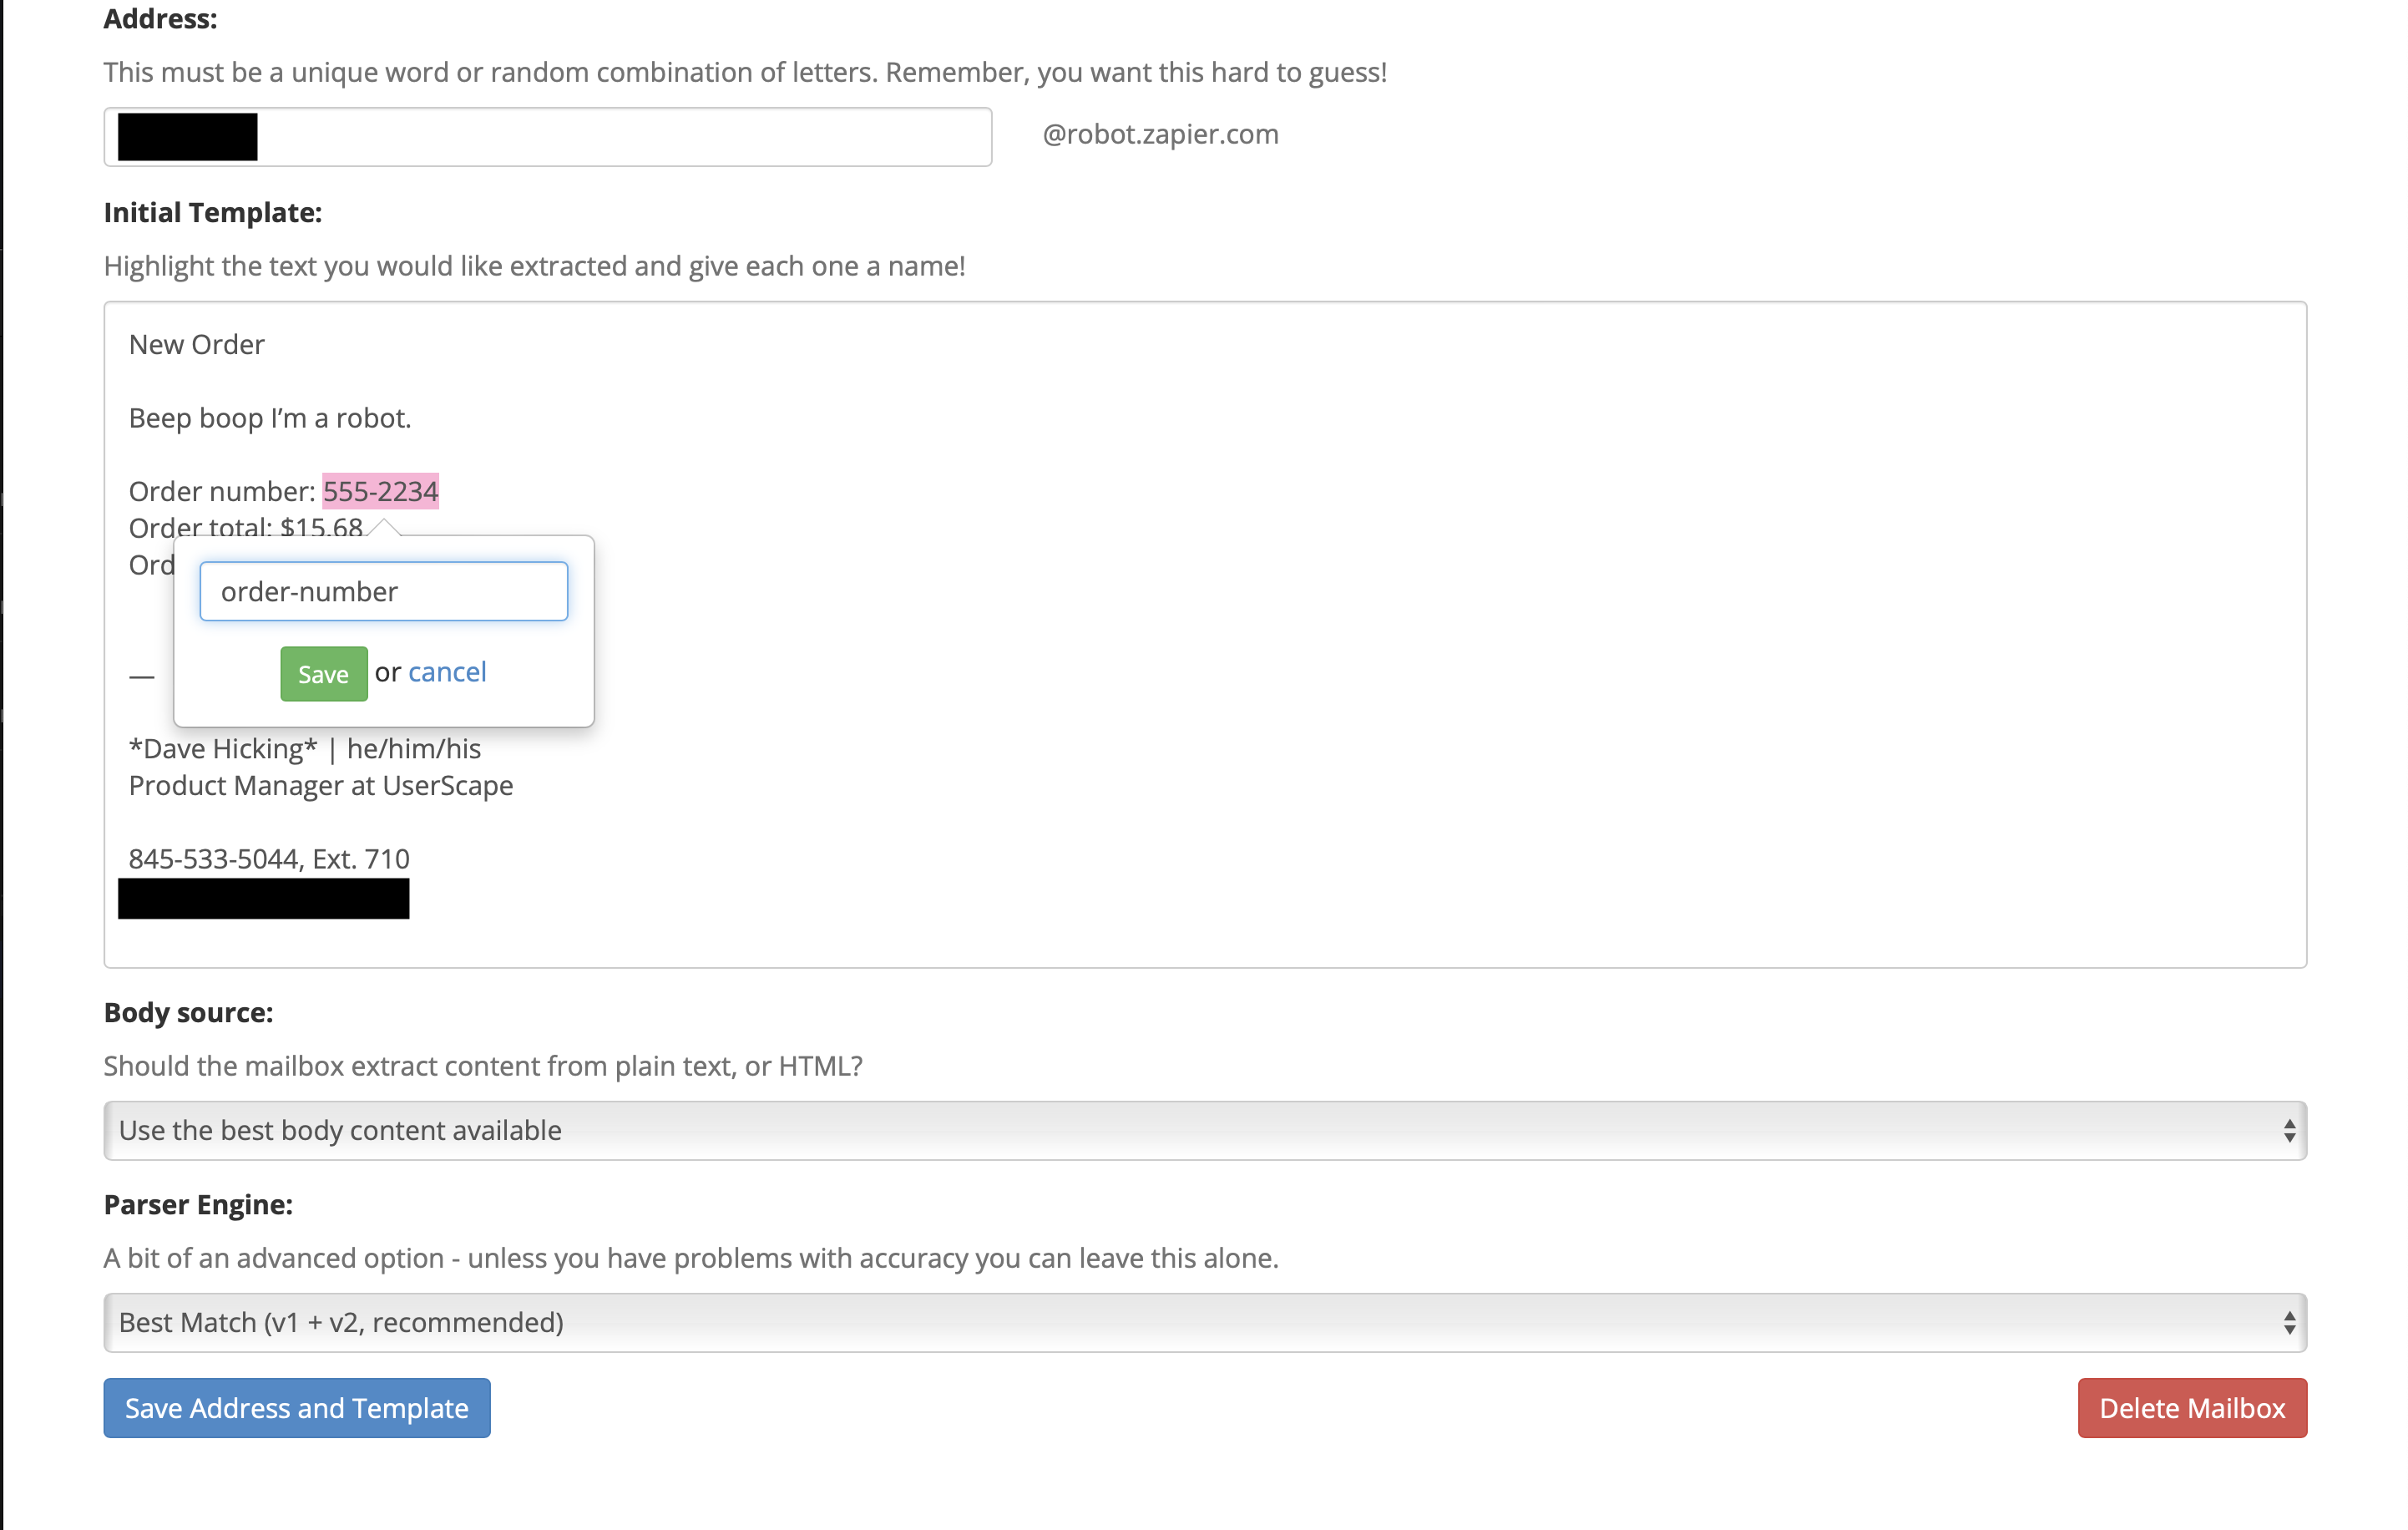
Template Configuration:

  • After you send the email, Zapier’s parser pulls in the email content.
  • Highlight the values in the email you wish to send to HelpSpot. Once highlighted, they appear encased in curly brackets with a variable name.
  • Name your template and save it using ‘Save Address and Template’.

Zapier Integration with HelpSpot:

Creating a New Zap:

  • Navigate to Zapier and log into your account.
  • Click on ‘Make a Zap’.

Setting Up the Trigger:

  • Look for the “Email Parser by Zapier” app.
  • Select the ‘New Email’ event.
  • Connect and pick the mailbox you created. This ensures that a new email triggers this Zap when parsed.

Setting Up the Action:

  • Look for the “HelpSpot” app in the action section.
  • Select the ‘Create a New Request’ event.
  • If you haven’t done so, connect to your HelpSpot account on Zapier.

Mapping Data:

  • On the mapping screen, specify how the parsed email data should populate fields in HelpSpot.
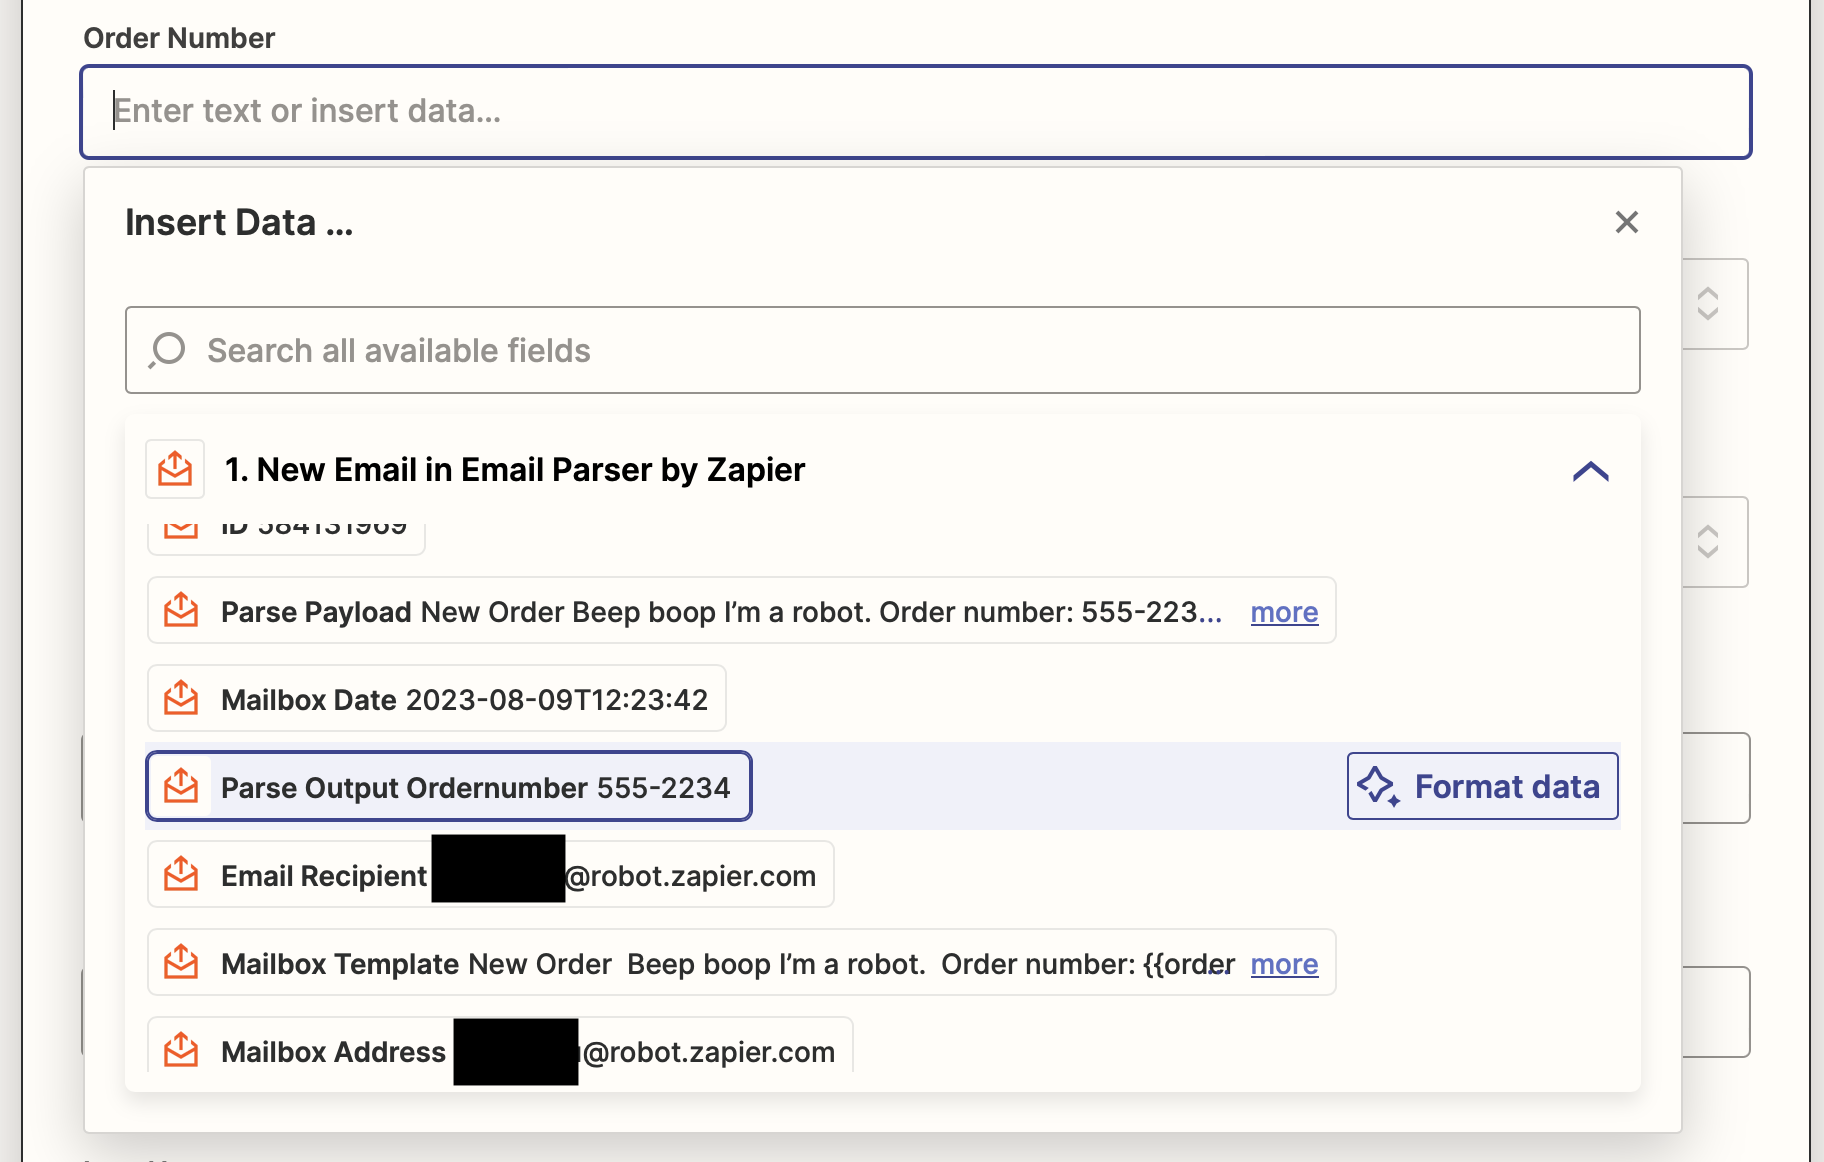
  • For instance, map an ‘Ordernumber’ from the email to an ‘Order Number’ custom field in HelpSpot.
  • Map the extracted email address to the email field in HelpSpot.
  • Remember to set other necessary fields, like Category!

Testing Your Setup:

  • Set everything up, then click the test button on Zapier.
  • If you’ve done everything right, a new request will appear in HelpSpot with the parsed information in the correct fields.

Activate Your Zap:

  • If the test passes correctly, activate your Zap. Every incoming email to the parser mailbox will automatically forward its data to HelpSpot.

That’s it! You’ve created a Zapier workflow that takes data from your automated emails and places that data into custom fields, letting you report, filter, and trigger even more automation inside of HelpSpot if needed.

Image of Ian Landsman
Ian Landsman
Ian founded HelpSpot in 2005 with the goal of making every interaction with your customers simple and efficient.
Case study logo or photo

We trust HelpSpot with our most important communication—and they've made a huge difference to our business.

Teagan West, Customer Service Manager

The Silent Partner

Your customer service at scale
Amplify your support with HelpSpot: the streamlined
solution for scaling customer service effortlessly